

INTRODUCTION
When one mentions "yoga", many images can be sexually explicit. In a dimly lit room, you can find images of 60-year-old flower children sitting in a circle with their feet in an impossible position, chanting "ohm" around a huge candle. Yoga is an ancient art that has been around for centuries. Over the years, it has grown in popularity as a way to stay fit, keep in touch with one's inner self, and balance emotion in the sometimes-insane world.
Yoga gained popularity in the 60's with Maharshi Mahesh Yogi, who popularized Transcendental Meditation (TM) in the 60's due to his association with the Beatles.

Many scholars believe that yoga dates back to 5000 years before the beginning of human civilization. Scholars believe that, due to the cultural similarities between modern Hinduism and Mehrgarh, yoga has now evolved from the Nism of the Stone Age, which is now in Afghanistan. In fact, most Hindu ideas, rituals and symbols today have their roots in this shamanic culture of Mehrgarh.
Early yoga and archaic shamanism had a lot in common as both tried to transcend the human condition. The primary goal of shamanism was to heal community members and act as a religious mediator. Archaeological yoga was also community oriented, as it sought to understand the cosmic order through intuition, the latter order being applied to everyday life. Later, yoga evolved into a more inner experience, and yogis focused on their personal knowledge and liberation.
There are many different places that also offer yoga classes - gyms, wellness centres, local YMCs. It is done just as easily when working at your home or at your desk. Yoga can help you bring inner peace when you are stressed. It can also help relieve headaches, back pain and menstrual cramps.
As yoga demonstrates the many health benefits of yoga, this centuries-old Eastern philosophy is rapidly becoming the new fitness soul mate for workout enthusiasts. Contemporary devotees try to keep the heart beating on a healthy note, from high heavenly officials to image-conscious Hollywood stars.
Strive for amazing physique. Leading athletes are also adding yoga to their training regime to develop balanced, injury-free muscles and spines.
Yet praising yoga for its physical benefits will only diminish what this whole system has to offer. By practicing yoga on a regular basis, you will be surprised that you are building a lot more than a strong, flexible body.
Initially, the sole purpose of Yogasana was to attain spiritual enlightenment. In Sanskrit (the ancient language of India), yoga means "yok" or "sangha", which describes the unification of mind and body to create a greater connection with one's own pure, essential nature.
A popular class in the United States usually teaches one of the many types of hand yoga, a physical discipline that focuses primarily on Asanas (postures) and prepares the body for spiritual pursuits.
We will try to simplify the ancient practice of yoga by showing you some basic conditions of yoga, giving tips on how to do yoga exercises, and incorporating the methods of meditation into your daily life. Through yoga and meditation, you can attain a new level of knowledge with your personal life and enhance the quality of your existence.
Yoga is no longer a mysterious phenomenon. This is an easy way to keep you healthy and aligned. Now relax and read while exploring yoga and meditation.
WHAT IS YOGA?
As we have said, Yoga is an ancient Indian philosophy that enhances personal growth and well-being. Although it is a systemic philosophical approach, yoga is not a religion, but completes most spiritual paths.
The physical aspect of yoga (Hatha Yoga) uses potential and focused breathing, which requires concentration and discipline. The result is a great combination of mind, body and spirit. One can practice yoga regardless of body or type, age, experience or physical abilities.
From the pop culture we should believe that in yoga your body is taken in an awkward position while looking at the candle and incense. It's a series of exercises that almost everyone can do - not just old and healthy young people. Yoga can also be done by seniors, people with disabilities and children.
Yoga is a tool to awaken the mind of the body to enhance whatever spiritual / religious beliefs you have. You will work your muscles and align your bones properly; You breathe deeply, give oxygen to the lungs and blood; You will experience truly cool relaxation.
By awakening the body, and working the muscles, you are able to relax them more than any type of exercise. Through yoga you will get deep appreciation of your body and mind in a way that no other exercise program will do.
Not only those who have not done any physical exercise, but also Olympic athletes get huge benefits through yoga. The foundation of traditional yoga is the careful alignment of your body as you keep it. This accuracy and the awareness that comes with it, leads to tremendous growth physically, mentally and emotionally.
Like all great arts and sciences, core yoga requires effort, determination and practice. But after that, the fruit we reap is always in proportion to what we plant and follow. That way, if you're looking for a quick fix, a quick remedy, a glitter of surface features, while true illness remains inevitable, you won't find satisfaction in yoga.
On the other hand, if you want to maintain or gain your health, vitality and vitality; If you want to feel young and strong; And if you are looking for a perfectly balanced and perfect form of exercise that anyone can start Over the age of seven, in any situation, and becomes more challenging when you become more progressive, yoga is for you!
There are many benefits to doing regular yoga. Yoga not only helps maintain a healthy lifestyle, it clears your mind and provides clarity of meditation - which we can use from time to time! Let us look at the benefits of yoga.
WHY DO YOGA?
Yoga builds both flexibility and strength with cardiovascular health. It creates mental clarity and attention and emotional balance. Yoga is safe for all ages and bodies. It facilitates healing from injuries and is a wonderful way to build well-being.
You can get strength, do jogging or aerobics, practice tie-chino to develop a sense of balance and harmony, stretch to get relief and meditate to increase peace of mind and relaxation. Yoga is a type of exercise that gives you everything: strength, endurance, balance, relaxation and relaxation. It is the only complete form of bodywork that does all this.
Yoga increases flexibility because it offers objects that work on the various joints of the body including those joints that are not always beyond the ability to notice. Although these joints are rarely exercised, with yoga, it is!
Different yoga positions use different tendons and ligaments of the body. Even parts of the body that can be quite stiff are not consciously working and begin to experience significant relief. Unrelated non-rigid yoga positions work relative to each other on certain parts of the body. When working together, they work consistently to create situations where flexibility is relatively easily achieved.
Yoga is probably the only form of activity that fully massages all the internal glands and organs of the body, such as - like the prostate - that are rarely stimulated externally throughout our lives. Yoga works in a healthy way on different parts of the body. This stimulation and massage of the limbs in turn benefits us by keeping the disease away and considering the first possible occasion of the onset of the disease or disorder.
By gently pulling the muscles and joints as well as massaging the various organs, yoga ensures maximum blood supply to different parts of the body. This helps in getting rid of toxins from each nook and cranny as well as providing nutrition till the end point. This leads to benefits such as delayed aging, energy loss and significant loss of life.
But these enormous physical benefits are just the “side effects” of this powerful practice. This results in real quantum gains. It is now an open secret that the will of the mind has enabled people to achieve extraordinary physical feats, which proves beyond doubt the connection of mind and body.
Yoga through meditation does a remarkable job of achieving this harmony and helps the mind to work in harmony with the body. How often do we feel that we are unable to carry out our activities properly and satisfactorily due to confusion and conflict in our minds? Moreover, the stress that is in fact a killer that affects all parts of our physical, endocrine and emotional system can be corrected by the wonderful yoga practice of meditation.
In fact, yoga is exactly meditation, because both mind, body and spirit work to achieve the common goal of unity - a state of eternal bliss.
Meditation practices through yoga help achieve emotional balance through the team. This means that meditation creates situations where you are not affected by the events around you. This in turn creates a significantly calmer and more positive outlook, which also has enormous benefits on physical health.
There is no doubt that yoga has immense benefits for your health and well-being. So how do you get started with a yoga program? Let's look at the basic styles of yoga and what it means.
WHICH IS RIGHT FOR YOU?
In ancient times yoga was always referred to as a living animal with a tree, roots, a trunk, branches, flowers and fruits. Hatha Yoga is one of the six branches; Others include Raja Yoga, Karma Yoga, Bhakti (Devotional) Yoga, Jnana Yoga and Tantra Yoga. Each branch presents a specific approach to life with its unique characteristics and function. Some people find one branch more inviting than another. However, it is important to note that engaging in one of these pathways does not hinder the activity of the other, and in fact you will find many paths naturally overlapping.
Raja Yoga
Raja means "royal" and is the focal point of this branch of yoga. This approach involves strict adherence to the eight "limbs" of yoga mentioned by Patanjali in the Yoga Sutras. Also found in many other branches of yoga, these organs or stages, follow this order: moral standards, Yama; Self-discipline, rules; In posture, Asana; Breathing expansion or control, Pranayama; Sensory withdrawal, withdrawal; Concentration, concentration; Meditation, meditation; And ecstasy or ultimate liberation, samadhi.
Raja Yoga attracts individuals who are self-absorbed and lead to meditation. Religious teachings and members of spiritual communities dedicate themselves to this branch of yoga. Although this path suggests a contemplative lifestyle, entering an ashram or a monastery is not a condition to do Yogasana.
Karma Yoga
The next branch is the path of Karma Yoga, and none of us can escape this path. The principle of Karma Yoga is that what we experience today is created by the actions of the past. Being aware of this, all our current efforts become a way of consciously creating the future that binds us to negativity and selfishness.
Karma is the path of self-transcending action. Whenever we do our work and live life in a selfish fashion and as a way of serving others, we practice Karma Yoga. Volunteering to serve meals in the soup kitchen or signing up in the workplace for peace corps or accommodation for humanity are prime examples of selfless service associated with the Karma Yoga path.
Bhakti (Devotional) yoga
Bhakti Yoga describes the path of devotion. In all creation, bhakti yoga is a positive way to channel emotions. The path of devotion gives us the opportunity to cultivate tolerance for everyone we come in contact with.
Bhakti yogi’s express devotion in every thought, word and deed - whether it throws away rubbish or calms the anger of a loved one. Mahatma Gandhi and Martin Luther King, Jr. are prime examples of devotional yoga. Mother Teresa's life and work are characterized by a combination of the devotional aspects of devotion and the selfless service of karma yoga and the path of devotional yoga.
Jnana Yoga
If we consider devotion to be the yoga of the heart, then yoga is the path of the mind, of wisdom, of age or of scholars. This path requires the development of intellect through the study of the texts of the yogi tradition. Yoga is considered the most difficult and at the same time the most direct. It involves study and will appeal to those who are more intellectually inclined. In the context of our Western religious traditions, Cabalistic scholars, Jesuit priests and Benedictine monks are the hallmarks of the Gyan Yogis.
Tantra Yoga
Probably the most misunderstood or misinterpreted of all yoga, tantra, sixth branch is the way of ritual, which includes sacred sexuality. The key word here is “sacred,” meaning to distinguish as sacred or a sacred thing.
In Tantric practice we experience divinity in everything we do. Respectful attitudes are cultivated by promoting rituals towards life. It is interesting to note that, while Tantra is entirely associated with sexual rituals, most Tantric schools actually recommend a celibate lifestyle.
In short, the system is the most specialized of the six branches. It will appeal to yogis who enjoy rituals and relate to the principle of femininity of the universe, which yogis call Shakti. If you see the importance of celebrations and rituals (holidays, birthdays, anniversaries and other rites of passage) and are deeply inspired, then Tantra Yoga may be for you. Whether it is a tea ceremony in Japan, the sanctity of the Eucharist in a Catholic group or the end of a relationship, many Tantric yogis participate in all kinds of ceremonies in Japan.
ASHTANGA YOGA
One of the most famous schools of yoga practice today is Ashtanga Yoga. Ashtanga literally means "eight limbs". These eight steps (organs) basically serve as a guide on how to live a meaningful and purposeful life. They serve as a prescription for moral and ethical conduct and self-discipline; They draw attention to one’s health; And they help us to accept the spiritual aspects of our nature.
The first organ, yes, relates to one’s moral standards and sense of honesty, it focuses on our behaviour and how we treat ourselves in life. Yams are best related to the universal methods we know as the golden rule, "Do as you please to others."
The second organ, Niyama, has to do with self-discipline and spiritual obedience. Examples of study rules are regularly attending temple or church services, saying grace before a meal, developing your own practice of personal meditation, or getting into the habit of thinking alone.
Commonly translated as breath control, this fourth stage involves techniques designed to master the respiratory process when the connection between breath, mind, and emotions is identified.
Implied by the literal translation of Pranayama, “increase in vitality”, yogis believe that it not only rejuvenates the body, but actually enhances life. You can use Pranayama as a separate technique (e.g., just do several breathing exercises), or integrate it into your daily yoga routine.
These first four stages of Patanjali's Ashtanga Yoga focus on improving our personality, mastering the body and cultivating self-awareness, all of which give us senses, mind, and consciousness.
Pratyahara, the fifth organ, i.e. khasi or sensory transcendental. It is at this stage that we make conscious efforts to keep our awareness away from the external world and external stimuli. We care so much about cultivating our senses, we draw our attention internally.
The practice of retraction gives us a chance to go back and see ourselves. This withdrawal allows us to observe our cravings objectively: habits that may be detrimental to our health and may interfere with our internal development.
As each phase progresses, the practice of stretching establishes concentration. After freeing ourselves from outside distractions, we will now face the distractions of the mind. Not an easy task!
In the practice of concentration, which is before meditation, we will learn how to slow down the thought process by focusing on a single mental object on object: the silent repetition of the image of a radiant centre, god or sound in the body. We have, of course, begun to develop the powers of our concentration in the first three stages of posture, breath control, and retraction of the senses.
In Asanas and Pranayama, although we focus on our actions, our attention travels. Our attention is constantly changing as we set the noise of a particular posture or breathing technique well. In solitude we will introspect; Now, in the picket, we focus our attention on a single issue. Extended periods of concentration naturally lead to attention.
Meditation or contemplation, the seventh stage of Ashtanga, is an uninterrupted flow of concentration. However, concentration (meditation) and meditation (meditation) can be one and the same, but a line of similar difference exists between these two phases. Where picketing is the only meditation, there is a state of awareness of without meditation.
At this stage, the mind has calmed down, and in stillness it produces few or all thoughts. The strength and endurance it take to reach this state of stability is quite impressive. But don't give up. If this sounds like an impossible but difficult task, remember that yoga is a process. Even if we don’t get the “picture perfect” pose or the ideal state of consciousness, we still benefit at every stage of our progress.
Patanjali has described the eighth and final stage of Ashtanga as a state of bliss. At this stage, the meditator merges with his focal point and moves the self fully. The meditator feels a living connection with the divine, connected with all living beings. This realization comes with “peace that transcends all understanding”; The experience of being one with joy and the universe.
On the surface, this seems like a kind of goal, rather solemn, “holier than you”. Yet, if we really check to get out of life, won't that joy, fulfillment, and freedom somehow move up the list of our hopes, desires, and aspirations?
What Patanjali describes as the culmination of the yoga path is deeply rooted, all men desire peace. We can also think a little about the fact that this is the final stage of yoga. Knowledge can neither be purchased nor possessed. It can only be experienced, the value of which is the sincere devotion of the aspirant.
Well, now that we’ve got it, let’s prepare the environment and get you ready for your yoga workout!
GETTING READY
Now that you have decided to take yoga for your health, you should consider the best environment and its preparation.
With waking up, empty the bowels, take a bath if you wish, then start the day with your Yogasana regime. The second most favorable time is early evening, around sunset.
It’s better to do something during the day than to miss being more rigid or idealistic. Always remember that yoga is a balanced recipe that maintains. To get the best out of your Yogasana, you should, whenever possible, mix it with the essential elements of practice and it will improve and enhance your spiritual awareness.
Asana - Yoga posture - 2-3- of food can be practiced at any time of the day except hours. You can posture when your body feels tight, tight, bored or hype-up. Asanas are best practiced in your yoga routine, followed by breathing (Pranayama) and then meditation.
Hours- After meals. Pranayama can be practiced at any time of the day except for hours. This can happen when you are stressed or tired or do not allow the space to posture. Pranayama is performed directly after the asanas without breaking the flow of awareness. Pranayama is a prerequisite for successful meditation.
Meditation can happen at any time of the day when you feel both awake and relaxed. For best results, you need to take hours of eating, sleeping or mentally "hype-up". Meditation should not be done in hours.
It is best to keep fresh air in a quiet and clean place which creates a yoga of concentration and awareness. Outside is OK but you should stay away from cold winds and germs. Wear loose-fitting comfortable yoga’s so that there are no restraints around the limbs.
Exercise on the stomach at least three hours after eating.
Do not push your body under any circumstances. Many people do not follow this advice. They force their body to exercise to see if the body is ready. This is a big mistake that can do more harm than good.
Work slowly with your body. Respect its limits. These limits will gradually expand and you will be relieved if you work regularly and sensitively to extend your limits. The body will get the message and the stress that stops you from moving forward will slowly come out. Relax shortly between each study.
Do not continue any exercise that causes pain. Pain is the body’s message that must be heard. In some cases, it may just be a process of changing the body. In such cases, you need to endure it and continue (without pressure) and it will pass slowly. In other cases, you may damage some part of your body and you will have to do some initial exercises by stopping before returning to that position.
Be sincere and focus on what you are doing. Keep your mind on the realization of what is happening in the body and focus on your breathing and position. Don’t think about other things or talk to anyone while exercising. If possible, without distractions such as radio or TV, it would be best if you are alone in the room so you can focus. If this is not possible, just try to focus on yourself and ignore what is going on around you.
Value your breath. Each exercise has its own unique way of breathing. In many cases, it is even more important than physical movements. Be conscious of your breathing and take slow and deep breaths as instructed in each exercise. Normally (with some exceptions) we inhale when we pull upwards or backwards and exhale when we pull downwards or forwards. Always inhale both inside and outside the nose unless otherwise specified. Remember “breathing through the nose to eat”.
Allow your attention to flow through the body, as you will become aware of each muscle and the tension and energy stored there and let that energy flow and relax the muscle. Exercises Complete your breathing exercises Complete a series of exercises with deep breathing and, if possible, deep relax.
There is no age limit for practicing yoga. However, the application of techniques varies according to the abilities of the practitioner. Consult their medical practitioner and their yoga teacher to increase any risks or difficulties associated with disability, severe, acute or chronic medical conditions.
Avoid exercising for at least three months after surgery, unless you have specific permission from your doctor. Some exercises should be resumed only 6 months after surgery, unless you have already started with your doctor's permission. Also, avoid any exercise at any time whenever you suspect internal bleeding or swollen appendix.
Do not practice any yoga techniques under the influence of alcohol or brain-changing drugs. Strict and fast diet rules are not required to start practicing yoga. One should not quit smoking, become a vegetarian or do purification to learn yoga. What you will find is yoga that can help you get rid of the bad habits you have been trying to get rid of for years and align your spiritual side which is the key to overcoming vices.
Let us now look at some of the asanas or places that are central to the yoga regime. We'll give you a good basic yoga workout to start your journey!
BEGINNING YOUR WORKOUT
We will use the term "workout" here because we have said that a workout is less and mind-body exploration is more. Sweating occurs during a workout when you push your body into exercise mode. It's not about yoga.
So, here is a great way to start your yoga plan. Do these exercises in the given order for good exercise.
Easy pose
Start with simple poses. A simple pose is a comfortable position for meditation. This pose opens the hips, lengthens the spine and promotes grounding and internalization. Basically, you sit cross-legged like you did at school like a small child. My teacher was saying, "Chris Cross Apple Sauce"!
With the buttocks on the floor, cross your legs and keep your feet below your knees. Face your hands with the palms facing your knees.
Press your hip bones down to the floor and reach the crown of the head to lengthen the spine. Release your shoulders down and back and press your chest against the room.
Relax your face, jaw and abdomen. Let your tongue rest on the roof of your mouth behind your front teeth. Breathe deeply through the nose down into the abdomen and hold until comfortable.
Downward-Facing Dog
After a simple pose, move the dog downwards. This is one of the most widely accepted poses. The Downward-Facing Dog is an all-round, rejuvenating.

Benefits include:
Calms the brain and helps relieve mild depression
Gives strength to the body
Pulls shoulders, hamstrings, calves, arches and arms
Strengthens the arms and legs
Men help relieve the symptoms of menopause
Eliminates menstrual discomfort when done with head support
Helps Prevent osteoporosis
Improves digestion
Relieve headaches, insomnia, back pain and fatigue
Therapeutic for high blood pressure, asthma, flat feet, sciatica, sinusitis
Use caution doing this pose if you have carpal tunnel syndrome, are in the late stages of pregnancy, or suffer from high blood pressure.
Bring your hands and knees to the floor. Set your knees directly below your hips and your arms slightly forward from your shoulders. Spread your palms, parallel or slightly out of the index finger, and rotate your toes down.
Exhale and raise your knees off the floor. Initially bend the knees slightly and raise the heels off the floor. Pull your tailbone from behind your pelvis and press it lightly towards the pubis. In the face of this resistance, raise the seated bones toward the ceiling and pull the inner leg from your ankle to the grocery.
Then with the exhale, pull your upper thigh back and pull your heels towards the floor or down. Straighten your knees but make sure not to bend them. Firm the outer thigh and roll the upper thigh slightly inwards. Narrow the front of the pelvis.
Firm the outer arms and press the base of the index fingers to the floor with these two points, move your inner arm from the wrist to the top of the shoulder. Firm your shoulder blade in front of your back then widen it and pull it towards the tail. Keep the head between the upper arms; Don't let it hang.
Stay in this pose anywhere from 1 to 3 minutes. Then exhale, comfortably bending your knees to the floor.
Sun Salutations
On days when you feel like you have no time for yoga, try and do at least one or two rounds of sun salutation. You will feel the difference.
After downward-facing dog, move in 3 rounds of sun salutation.

Stand facing the sun by touching both feet. Bring the hand from palm to palm. Inhale and raise the hand upwards. Slowly bend back, pulling hands over head. Slowly lean forward, exhale, touch the earth respectfully until the hands and feet come together, the head touches the knees.
Inhale and move the right leg to the back of the body towards the back. Hold the arms and legs firmly between the ground, keeping the left foot between the hands. Head. While exhaling, bring the left leg to the right.
Keep the arms straight, raise the hips and align the head with the hands, making an upper arch. Inhale and lower the body until the legs, knees, arms, chest and forehead touch the ground. Inhale and slowly raise the head and bend back as much as possible, bending the spine to the maximum.
While exhaling, bring the left leg with the right. Keep the arms straight, raise the hips and align the head with the hands, making an upward arch. Inhale and move the right leg to the back of the body towards the back.
Keep the hands and feet firmly on the ground, with the left foot between the hands. Head. Slowly exhale, lean forward, touch the earth with respect, until the hands are with the feet, the knees will touch the head.
Inhale and raise the hand upwards. Slowly bend back, pulling hands over head. Stand facing the direction of the sun with touching both feet. Bring the hands together, palm-to-palm, at the heart.
The sequence will look something like this:
Tree Pose – Vriksha Asana

Benefits include:
Strengthens the thighs, calves, ankles and spine
Ins wave and stretch the inner thighs, chest and shoulders
improves the sense of balance
relieve sciatica and reduce flat feet
Be careful if you suffer from insomnia or low blood pressure. If you have high blood pressure, do not raise your hand over your head.
Hold the hands together with the legs together and by your sides. Turn the right leg to the side of the knee, raise the right thigh and bring the sole of the right leg inside the left thigh as far as possible.
Balancing on the left foot, raise both hands above the head, keep the elbows uncontrollable and join the palms together. Hold the posture while breathing gently through the nostrils for about 10 full breaths.
Lower the arms and right leg and return to the tad-asana, standing position with feet together and arms at the side. Pause for a few moments and repeat on opposite legs. Do these two or three times per foot or until it is comfortable.
Maintaining balance on one foot is the challenge of a tree seat. Poor balance is often the result of a restless mind or distracted meditation. Regular practice of this posture will help in concentrating the mind and cultivating concentration (dharna).
When practicing tree-asana it helps to visualize or consider a tree and can use the following technique: Imagine that the foot on which you are balancing is the root of the tree and the foot is the trunk.
Continue to imagine the head and elongated arms as tree branches and leaves. You may be unstable for a while and the body is flowing back and forth, but do not break the concentration. Like a tree submerged in the wind and still standing upright, the body can maintain balance.
Aims to achieve the "roots" and stems of the tree. Regular practice of Vriksha-asana improves concentration, balance and coordination. Because the whole-body weight is balanced on one leg, it also strengthens and tones the leg muscles.
As you move forward in this posture and are able to stay standing for more than a few moments, try to maintain balance by closing your eyes.
Extended triangle pose

Benefits include:
Stretches and Strengthens the thighs, knee and ankles
Stretches the hips, groins hamstrings and calves; Shoulders, chest and spine
Stimulates the abdominal organs
Helps relieve stress
Improves digestion
Helps relieve the symptoms of menopause
Relieves backache, especially through the second trimester of pregnancy
Therapeutic for anxiety, flat feet, infertility, neck pain, osteoporosis and sciatica
Be careful if you suffer from low blood pressure, have a heart condition, or have a throat problem.
Hold the hands together with the legs together and by your sides. Separate the legs slightly forward from shoulder distance. Inhale and face with both hands’ straight shoulders parallel to the floor.
Exhale while rotating the torso to the left. Bend at the waist and bring the right arm down to the left ankle. The palm of the right hand is placed on the outside of the foot of the left foot. The left arm should be extended upwards. Both legs and arms are kept straight without bending the knees and elbows.
Turn the head upwards to the left and look at the finger of the left hand. Return to standing position with breath and extended arms. Hold this position for the duration of the exhalation. Exhale and repeat on the opposite side.
The triangular pose basically focuses gently on the legs while focusing on your breath and stretching your body.
Seated Forward Band - Paschimottanasana
Literally translated as the "intense stretch of the West", Paschimottanasana can help a distracted mind unwind.

Benefits include:
Calms the brain and helps relieve stress and mild depression
Pulls the spine, shoulders, hamstrings
Stimulates the liver, kidneys, ovaries and uterus
improves digestion
Helps relieve the symptoms of menopause and menstrual discomfort
Soothe headaches and anxiety and reduce fatigue
Therapeutic for high blood pressure, infertility, insomnia and sinusitis
Traditional texts say that Paschimottanasana increases appetite, reduces obesity, and cures diseases.
Be careful if you have asthma or a back injury.
Sit on the floor with your buttocks folded in a blanket and your legs supported directly in front of you. Press actively through your heels. Slightly shake your left buttock, and pull your right sitting bone away from the heel with your right hand. Repeat on the other side.
Rotate the top thigh slightly and press it down to the floor. Press on the floor next to your hips with the tips of your palm or finger and bring the top of the sternum down with the top thigh.
Draw the length of the inside of the pelvis. Inhale and keep the front torso long, not at the waist, leaning forward at the hip joints. The length of the tailbone.
Away from the back of your buttocks. If possible, extend the sides of the foot with your hands, on the toes, the elbows fully; If this is not possible loop the strap around the sole of the foot and hold the strap tightly. Make sure your elbows are straight, not bent.
When you are ready to move forward with your hands on your legs or holding the belt, do not force yourself to move forward. Always keep the head up and the front torso long.
If you hold the foot, turn the elbow to the sides and remove it from the floor; If you hold the strap, loosen your grip and keep the arms long, keep the arms long. The lower abdomen should touch the thigh first, and then the upper abdomen, then the ribs and head.
With each inhalation, slightly increase and lengthen the front torso; With each breath out, the next turn is released a little more. In this way the torso lengthens almost vaguely with silt and breathing. Eventually you will be able to extend your arms to the floor.
Stay anywhere in the pose for 1 to 3 minutes. To come up, first remove the torso from the thigh and straighten it again if the elbow is bent. Then inhale and lift the torso from the top by pulling the tail down and into the pelvis.
Bound Angle Pose - Baddha Konasana
The Bound Angle Pose, also called the Cobblers Pose after the typical seat of an Indian cobbler, is an excellent groin and hip-opener.

Benefits include:
Stimulates abdominal organs, ovaries and prostate gland, bladder and kidneys
Stimulates the heart and improves normal circulation
Stretches the inner thighs, groins and knees
Depression helps relieve mild frustration, anxiety and fatigue
Soothes menstrual discomfort and sciatica
Helps relieve the symptoms of menopause
Therapeutic for flat feet, high blood pressure, infertility and asthma
Consistent practice of this pose until late into pregnancy is not said to help ease childbirth.
Traditional texts say that Baddha Konasana destroys disease and gets rid of.
If your hips or groin are tight, sit on a blanket with your buttocks straight and your legs straight. Exhale. Bend your knees, pull your heels towards your pelvis, then bring your knees out to the sides and press the soles of your feet together.
Bring your heels as close to your pelvis as you can comfortably. With the first and second finger and toe, hold the big toe of each foot. Always keep the outer edge of the foot on the floor. If it is not possible to hold the foot, clasp each hand around the ankle or shin on the same side.
Sit so that the front pubis and the rear tail are layered along the floor. The perineum will then be in a neutral position almost parallel to the floor and pelvis. Firm the sacrum and shoulder blades against the back and extend the front torso from the top of the sternum.
Never push your knees. Draw to the floor of the thigh bone instead. When this leads to action, the knees follow.
Stay in this pose anywhere from 1 to 5 minutes. Then inhale, raise your knees off the floor, and extend the legs to their original position.
Wide-Angle seated forward band – Upavistha Konasana
Upavistha Konasana is a good preparation for the most forward sitting bends and bends as well as wide-leg standing poses.

Benefits include:
Stretches the insides and backs of the legs
Stimulates the abdominal organs
Strengthens the spine
Calms the mind
Releases groin
Be careful with this exercise if you have a lower back injury.
Sit in front of you with your legs extended forward, then bend your torso slightly over your arms and raise your legs to an angle of about 90 degrees and make the legs approximately right angle with the pubis with the pub). Press your hands against the floor and slide your buttocks forward, legs 10 to 20 degrees wide. If you can't sit comfortably on the floor, raise your buttocks over a folded blanket.
Rotate your thighs outwards, pinning the outer thighs against the floor, so that the knee caps lead directly to the ceiling. Reach your heels and pull your shoes, pressing the ball of the foot.
Run your arms forward between your legs, the thigh bones are pressed heavily to the floor and your knee caps point to the ceiling. Keep your arms long.
Like all forward curves, the emphasis is on moving beyond the hip joints and maintaining the length of the front torso. As soon as you bend yourself at the waist, re-establish the length of the navel from the pubis, and continue if possible.
Extend forward on every breath out until you feel a comfortable stretch on the back of your foot. Stay in the pose for 1 minute or more. Then return to inhalation with a long front torso.
Full boat pose
Strengthening the abdominal and deep hip flexors, for a boat you need to balance your sitting bones and the tripod of the tailbone.

Benefits include:
Strengthens the abdomen, hip flexors and spine
Stimulates the kidneys, thyroid and prostate glands and intestines
Helps relieve stress
improves digestion
Be careful if you have low blood pressure, insomnia, sore throat, pregnancy or menstruation.
Sit on the floor with legs straight in front of you. Press your hands on the floor behind your hips, fingers pointing to the feet and strengthening the hands. Lift from the top of the sternum and bend back slightly. As you do this make sure your back does not get round; Continue to keep the front of your torso long between the pubis and the top sternum. Sit on your two sitting bones and the “tripod” of the tailbone.
Exhale and bend your knees, then raise your legs off the floor so that the thighs are angled at about 45-50 degrees relative to the floor. Extend your tail to the floor and raise your pubis towards your navel. If possible, slowly straighten your knees, raising the eyes of your toes slightly above eye level. If this is not possible with your knee bend, perhaps a burning erection parallel to the floor.
Pull your arms with each other and feet parallel to the floor. Spread the shoulder blades over your back and reach firmly through the fingers. If this is not possible, place your hands on the floor next to your hips or hold the back of the thighs.
While the lower abdomen should be firm, it should not be stiff and thick. Try to keep the lower abdomen relatively flat. Move the thigh bone head towards the floor to anchor the pose and lift the top sternum lift. Breathe easily. Tip the chin slightly towards the sternum so that the base of the skull comes down slightly from the back of the neck.
Stay in the pose for the first 10-10 seconds. Gradually increase your investment to 1 minute. Exhale, exhale and sit up straight on inhalation.
Bridge Pose
This active version of the bridge pose calms the mind and rejuvenates tired legs.

Benefits include:
Stretching the chest, neck and spine
calms the brain and helps relieve stress and mild depression Dome
Stimulates the abdominal organs, lungs and thyroid
Stimulates tired legs
Improves digestion
Helps to relieve symptoms of menopause
Relieves menstrual discomfort when done Supported
Reduces Anxiety, fatigue, backache, Discomfort, Headache and Insomnia
Therapeutic asthma, high blood pressure, osteoporosis and sinusitis
Use caution if you have a neck injury.
Keep the supine on the floor, and if necessary, place a folded blanket under your shoulders to protect your neck. Bend your knees and set your feet on the floor, sitting as close to the bone as possible.
Exhale and, actively press your inner legs and arms to the floor, push your tail bones upwards towards the pubis, firming the buttocks (but not stiffly) and lift the buttocks off the floor. Keep your thighs and inner legs parallel. Extend the palms of the hands below your buttocks and extend the arms to stay on top of your shoulders.
Raise your buttocks until the thighs are parallel to the floor. Keep your knees straight on the heels, but move them away from the hips and extend the tail legs towards the back of the knees. Raise the pubis towards the navel. Raise your chin slightly away from the sternum and place the shoulder blade in front of your back, pressing the top of the sternum towards the chin. Firm the outer arms, lengthen the shoulder blades and try to increase the space between them to the torso at the base of the neck (where they rest on a blanket).
Stay anywhere in the pose for 30 seconds to 1 minute. Exhale, slowly rotating the spine to the floor.
Legs-Up-the-Wall Pose - Viparita Karani
Said to reverse the normal downward flow of a precious subtle fluid called amrita (immortal) or soma (extract) in the Hatha Yoga Pradipika, modern yogis agree that Viparita Karani may have the power to cure whatever ails you.

Benefits include:
Relieves tired or cramped legs and feet
Gently stretches the back legs, front torso, and the back of the neck
Relieves mild backache
Calms the mind
Relax the hind legs, pull the front torso and neck Relieves mild back pain
The pose described this is a passive, supported variation of the shoulder stand. For your support you'll need one or two thickly folded blankets or a firm round bolster. You'll also need to rest your legs vertically (or nearly so) on a wall or other upright support.
Before performing the pose, determine two things about your support: its height and its distance from the wall. If you're stiffer, the support should be lower and placed farther from the wall; if you're more flexible, use a higher support that is closer to the wall.
Your distance from the wall also depends on your height: if you move shorter than the wall, if you move higher than the wall. Experiment with your support position until you get a placement. Start with your support about 5 to 6 inches away from the wall. Sit horizontally on the right side of the support, with your right side against the wall (leftists can take the "left" option for "right" in these instructions). Exhale and, with a simple movement, turn your head against the wall and your shoulders and go down slightly to the floor.
The first time you do this you can slide back and down with your buttocks on the floor. Don't despair. Try lowering the support and / or moving it slightly away from this wall until you get some relief from this movement.
Your seated bones do not need to be exactly against the wall, but they should be "dripping" into the space between the support and the wall. Check that the front of your torso is slowly arched from the pubis to the top of the shoulders.
If the front of your torso feels flat, then you have slipped a little from the support. Bend your knees, press your feet against the wall and lift your pelvis a few inches from the support, support slightly below your pelvis, then bring your buttocks back to support.
Lift and release the part of your skull from the back of your neck and soften the throat. Don’t push your chin against your sternum; Instead, move your stern towards the chin. If the cervical spine feels flat, take a small roll under your neck (for example, made of a towel). Open your shoulder blades away from the spine and stick your arms and arms out over your sides, palms.
Keep your legs relatively firm, just enough to hold the vert in one place. Lean the thigh bone head and the weight of your abdomen with the deepest part of your torso, releasing it at the back of the pelvis. Soften your eyes and look at your heart.
Stay in this pose anywhere from 5 to 15 minutes. Be sure not to twist the support when it comes out. Instead, slide the support to the floor before turning to the side. You can also bend your knees to support your buttocks off and push the legs against the wall. Then slide the support to one side, lower your pelvis off the floor, and turn to the side. Sit on your side to take a few breaths, and sit with your breath.
Corpse Pose (Savasana)
Savasana is a tenfold way of complete relaxation - making it one of the most challenging asanas.

Benefits include:
Calms the brain and helps relieve stress and mild stress.
Relaxes the body
Reduces headaches, fatigue and insomnia
Helps reduce blood pressure
The body should be kept in a neutral position in the Savasana. Sit on the floor with your knees bent, feet on the floor and bend back at your forehead. Raise your pelvis slightly above the floor and, with your hands, pull towards the back tail of the pelvis, then return the pelvis to the floor.
Inhale and slowly push through the right leg, then to the left, through the heels. Release both legs, soften the groin and see that the legs are evenly angled compared to the mid-line of the torso and the legs turn out evenly. You should narrow the front pelvis and soften the lower part (but not deftly). Remove the base of the skull with your hand from the back of the neck and leave the back of the neck towards the tail. If you have trouble doing this, support the back of the head and neck with a folded blanket. Also extend the base of the skull, and raise the neck part diagonally to the middle of the head. Make sure your ears are equal to your shoulders.
Reach your hands to the ceiling at right angles to the floor. Rock slightly from the side and keep the shoulder blades away from the back ribs and spine. Then drop the weapon to the floor, elbowing it evenly along the mid-line of the torso.
Rotate the arms outwards and pull them out of the space between the shoulder blades. Rest the back of the hand as close to the floor as possible to the knuckles of the rest of the finger. Make sure the shoulder blades rest evenly on the floor. Imagine that the lower tips of the shoulder blades are lifting diagonally towards the top of your back. From here, spread the collarbones.
In addition to calming the physical body in Savasana, it is also necessary to calm the senses. Soften the roots of the tongue, the wings of the nose, the channels inside the ears, and the skin of the forehead. Especially around the bridge of the nose between the eyebrows. Let the eyes sink into the back of the head, then lower them to look at the heart. Leave your brain at the back of the head.
Stay in this pose for 5 minutes for every 30 minutes of practice. To exhale, exhale first and slowly roll to one side, preferably to the right. Take 2 or 3 breaths. With the second breath, press your hands against the floor and raise your torso, then slowly pull your head up. The head should always come last.
After completing these exercises, take a few moments to practice deep meditation, which will be covered in the next section.
MEDITATION
Meditation can be more accurately called relief. It seeks to reach a state of peace of mind and body. Achieving balance between the two can lead to self-realization and inner peace. Who couldn't use it?
Paying attention is really easier than you think. Most of us consciously relax - perhaps during an exercise class or at the dentist, to manage pain or participate in discomfort before the test. We start by paying attention to our breathing. The practical endeavor of meditation is to take our mind away from the “disturbances of the mind” and to concentrate fully on our breath which constantly tries to invade our mind and removes the emotions that will lead to a quiet time.
The goal is to clear your mind of repeated attempts - to think about it, nothing is going to happen and the process of meditation takes away its away. The result is peace, serenity, peace that ultimately leads you to new insights.
Our world can be fast, fun and exciting. It is also challenging, trying, demanding and intimidating. Both of these aspects of our lives produce stress, emotional reactions, anxiety, worry and anticipation. Only many of these can be tolerated in our bodies and minds. After a while, each of us reaches the point of saturation and the results come in the best unsettling; For some, it can be unbearable, even unbearable.
There is no right or wrong behaviour during your meditation. It’s your time for you. Everyone deserves this kind of personal attention. This is a self-care activity; Love yourself!
Teach your children from time to time in their room or corner. Teach it to your friends, family, anyone who will listen. We can share this gift and come back as we give. We are all good because of everyone who cares. Peace and joy are experienced by those who meditate who enter the world as a positive energy holiday for all of us. The world is a better place than that.
So, what exactly is meditation? There are many types of meditation. One definition that fits almost all types is ... "Consciously direct your attention to change the state of your consciousness."
There is no limit to the things you can draw your attention to ... symbols, sounds, colors, breaths, uplifting thoughts, the spiritual realm, etc. Your consciousness.
Traditionally meditation for spiritual development (and still is) ... that is. Becoming more conscious; Revealing our inner light, love and wisdom; Becoming more aware of the guiding presence in our lives; Enhancing our true self ... the domestic journey of our spirit.
More recently, meditation has become a valuable tool for finding a peaceful oasis of meditation and stress relief in a fast-paced world.
It can be used for healing, emotional purification and balance, increasing concentration, unlocking creativity and finding inner guidance. Meditation is also the culmination of yoga exercises as your body reaches a state of rest, so does your mind.
When you start your meditation, set your expectations aside and don’t worry about doing it right. There are infinite possibilities and there are no set criteria for determining proper attention. However, there are some things to avoid. Don’t force yourself to do something. Don’t analyses meditation further and try to clear your mind or dispel thoughts. There is no one “right” way to meditate, so just focus on the process and find the best way for you!
Get a quiet, comfortable place to meditate. You can sit on the bed, on the floor, in a comfortable chair ... anywhere you are comfortable. Cross-legged seating is not necessary. Your feet can be in any position that is comfortable. Remove as much noise and distractions as possible. Don't worry about things you can't control.
Sit comfortably while you meditate, your spine fairly straight. This allows the spiritual energy to flow freely through the spinal cord, which is an important aspect of meditation. It is OK to lean against the back chair, wall, headboard, etc. If, for physical reasons, you cannot sit, place it flat on your back. Put your hands in a position that is comfortable.
There are many types of meditation you can practice. We will explore some of the more popular and effective ones.
UNIVERSAL MANTRA MEDITATION
This Meditation comes from an ancient Indian text called Malini Vijaya Tantra, which is about 5000 years old. It is a very simple meditation, yet very powerful in its ability to calm your mind and connect you to your essence or inner spirit.
This meditation uses the mantra as the purpose of your meditation. A mantra is a word or sentence that has the power to transform a deeper, more peaceful state of awakening. This is the most used mantra for meditation: Om. Om is not a literal translation. Rather, it is the essential vibration of the universe. If you consider the real sound of the universe, you can hear the eternal sound.
Although this mantra is sometimes chanted aloud, in this meditation you will repeat the mantra in silence. Before we get to the actual steps, there are some important points to keep in mind.
One of the keys to this meditation is to repeat the mantra humbly or deftly in your mind.
The power of this technique comes from going into the deepest realm of awareness and drawing your attention. So, even if you focus on the mantra, focusing on the mantra is not the purpose of this meditation. Trying too hard to stay focused prevents your attention from descending into the real deep field. Instead, you’ll repeat the mantra with “minimal effort” and give your mind a little wandering space.
Resist the temptation to become something, and let the mantra work.
This meditation is easily transformed into a deeper, more peaceful state of awakening. (This can vary from session to session.) It increases the flow of energy to the brain and removes a good deal of physical and emotional toxins.
Because of this detoxification, it is best to keep this meditation for 10 or 15 minutes a day when starting first. After a month or so, it can be increased to 20 minutes, but it should be a maximum for anyone who has not experienced years of meditation. Also, drinking very pure water is advised. Finally, mantra meditation accelerates spiritual development as you attain a state of relaxation and self-awareness.
Sit comfortably, with your eyes closed and your spine reasonably straight.
Start repeating the mantra gently in the mind.
Repeat the mantra at whatever tempo feels most natural. The mantra doesn’t need to be synchronized with your breath, but if this happens naturally, that’s fine.
Allow the mantra to arise more deftly in your mind ... repeat it with less effort.
Continue to repeat the mantra in a circle, and allow what happens.
If at any time, you feel like you are slipping into a sleep-like or dream-like state, let it happen.
If and when you see that your attention is completely distracted from the mantra, slowly start repeating it again, and continue with less effort.
After 10 or 15 minutes, stop repeating the mantra, and slowly come out of your meditation.
RELAXATION MEDITATION
This remarkably simple and relaxing meditation uses a little-known secret about the eyes. Allowing the eyes to look soft down has the effect of instant, automatic relaxation. Relaxation meditation provides a great deal in reducing stress and can be used as a quick and refreshing break in about 2 minutes. You will also feel the intensity of awareness.
Sit comfortably straight with your spine.
Allow your eyes to rest comfortably downwards, looking softly, but not focusing on anything.
Without closing your eyes completely, let your eyelids go to the level that feels most comfortable.
Keep looking down ... the act of staring is your primary focus (rather than the field you're looking at). You will see your breathing become more rhythmic.
It's okay to let your attention grow a little. If your eyes get too heavy, it's okay to let them close. If you notice that you are out of your comfort zone, bring your attention back to your comfortable low gaze.
ENERGY HEALING MEDITATION
In this simple meditation you send the powerful Healing Life Force directly to the area where you need help. This life force is the power behind all healing. Wherever this energy flows and there is balance there is health and well-being. Wherever this blocked state is blocked or out of balance the disease manifests.
Many people believe in visualization as a key healing tool. Energy Healing Meditation helps you to focus your positive energy on the affected area and eliminate any adverse symptoms and feelings manifested by physical pain.
Sit reasonably upright and close your eyes.
Breathe slowly, as quietly as possible. (It is not recommended to hold your breath after in haling or exhaling.)
As you breathe in, feel the healing life force breathing through your solar plexus. Picture this life force as a very pure, light energy.
As you exhale, gently direct this light energy to the affected area. If there is no disease area, exhale. Spread this light energy radiation all over your body.
Continue until you feel that the area has not received enough life force.
COLOR HEALING MEDITATION
We are not just our physical selves. We are made up of multi-dimensional beings, the inner spirit, the mental body, the emotional body, an important body and a physical body. The physical state of the body gradually becomes subtle, from the physical to the spiritual. Illness begins with a discrepancy in one of these energy organizations. If not harmonized, the disease moves outward, affecting the moist body, eventually manifesting as a physical illness.
Total healing it is necessary to restore harmony in our whole body. This meditation is designed to purify and harmonize your various body coloring healing energies’.
Colour Healing Meditation will provide you cleansing, balance and healing at all levels: spiritual, mental, emotional, vital and physical. It will also develop concentration and visualization abilities.
Sit comfortably with eyes closed.
Imagine a big ball of cheerful golden light a few inches above your head. Imagine that a ball of light slowly descends from the top of your crown and fills your whole being with golden light.
Imagine yourself absorbing that light as it nourishes, purifies and heals your whole life - your soul and your whole body - dissolving all the blocking and toxic energies.
Repeat this exercise by imagining a ball of Red light. Continue to the whole spectrum like this by visualizing the ball of Orange light; Yellow light; Green light; Blue light; Indigo Light; And violet light. Go through the spectrum at whatever pace feels appropriate.
Take some time to imagine yourself in a state of perfect, happy health.
CENTERING
Cantering is meditation in action. There is a place inside you that is always quiet and peaceful. This place is often referred to as your "calm centre". Staying focused means staying in your quite cantered amidst the hustle and bustle of everyday life. Staying focused means not letting your inner light be overshadowed by stressful circumstances or negative thoughts and feelings.
When you are focused, you are in a state of clarity, meditation, peace and balance. When you are not focused, you are not vague, focused, stressed and balanced.
A good centralized technique will require only minimal attention, allowing you to keep your focus on your hand activity. Here are some very simple, effective focusing techniques.
1. Easy breathing awareness
When you are involved in whatever you do, pay a little attention to your breathing for a moment ... you don't have to pay full attention ... enough to bring you back to your quiet centre. Breathe naturally, or maybe a little more slowly.
2. Reclaim your Energy
When you feel stressed and scattered, take several slow, deep breaths. With each breath, imagine that you are drawing all your scattered energy and attention back to your inner self ... to your quiet centre.
3. Letting Go
This focused technique combines breathing awakening with the phrase or mantra, "Let's go." This is especially helpful when you are dealing with a stressful situation or a negative thought or emotion. As you breathe, say (quietly or loudly), "Let's go."
When you exhale, say "go" ... let go of all the stress you are going through.
4. Inner Sun.
Imagine a bright sun filling your heart chakra ... a calm, subtle energy radiance that enters your chest area. Imagine that the sun humbly manifests peace and joy throughout your being.
Yoga and meditation have certainly proven to be effective tools to reduce stress and provide a calm spirit that cannot be achieved through traditional exercise. So, what are those stressful days in stress fees when you are unable Focusing on work due to outside distractions? You can do yoga at your desk if you want! Let's look at "Desktop Yoga".
DESKTOP YOGA
Whether you’re a high-powered executive or an administrative assistant with your own boss’s problems becoming your own, many people in the business world experience excessive stress at fees. It would be nice to have a quiet place to study traditional yoga techniques, but that is not always possible.
Yoga experts have created a way for a short yoga program right at your desk. Try these exercises for de-stress in the office.
Sit tall in your chair, or stand up if possible. Pull your hand up to the overhead and interlock your fingers, turning the palms towards the ceiling. Side Inhale and exhale Extend the torso to your side and bring the tips of the shoulder blades into the body. Take another deep breath and exhale and pull to the right, inhale and exhale to the left.
When inhaling, raise your shoulders up to your ears and then exhale and release them. Repeat 3 times. Fully contract the shoulder muscle when you lift your shoulder up and then on the drop it will be more completely free.
Stand (or sit at your desk) planted firmly in the ground with your feet. Inhale and raise the arms to the side, palms down. Exhale and turn over the palms, turning the shoulders back. Inhale and exhale, bending the elbows at the waist. Inhale and exhale, bring the palms to the abdomen. This exercise helps to open the chest and lengthen the back.
Take your hands behind your back and interlock the fingers, pulling the shoulders back, open the chest. Take several breaths. Make sure your head stays in the mid-line and your gaze is on the horizon.
Stand next to the wall, extend your right hand and place your palm on the wall with your fingers. When you exhale, rotate your chest with the shoulder blades in your torso.
Desk Stay sideways next to your desk and point your palms towards your body with your fingers at the top of the desk. Gently pull the lower arm and wrist.
Wrap your right hand around the torso and place your right hand on the left shoulder at elbow height and face forward at chest height. Place your left hand on the right elbow and exhale, pull it to the left, open between the shoulder blades. Hold a few breaths and then release. Repeat on the other side
Air Bend the right hand in the air and exhale, bend at the elbows and reach your fingers back down, between the shoulder blades. Slowly pull the elbow with the left hand on the elbow and exhale. Relax the ribs and hold several breaths. Release and repeat the other side
Chest Place your hands on one side of your chest and then one side below the elbows, place the hands towards each other and the fingers towards the ceiling. Exhale and slowly raise your arms so that the elbows reach shoulder height, keeping the shoulders down. Repeat on the other side.
Sit on your chair and pull back from the desk, resting your palms on top of the desk and stretching the torso to your side. Raise the ribs up, let the shoulder blades slide towards the desk, and make sure the head extends from the spine to the chin to the chest.
Sit on your chair, feet firmly planted in the floor, press the bones into the chair. Extend the side torso, and bend to the right (on the exhale), one hand behind the chair, one hand on the side of the chair. Hold for a few breaths and then repeat on the other side.
Sit in your chair and make your legs slightly wider than your hips. Lean forward from the hips and lower your torso. Let the head and hands hang towards the floor.
Sit upright in your chair with the chair firmly planted on the ground. Press your sitting bones under the chair and lengthen the torso to the side. Rest your shoulders. Place your palms on your knees and fingers wide. Exhale and exhale; extend your tongue to your chin; Focus your eyes on your nose. Inhale and bring the tongue back into the mouth. Exhale and stick the tongue again and this time focus the eyes on your forehead. Repeat 3 times.
Sit upright in a chair, relax your shoulders and stretch your torso to the side. Relax your facial muscles, jaw and tongue. Circle the eyes 8 times clockwise and 8 times clockwise. Close your eyes and take deep breaths for a few slow breaths.
You can try quick relaxation meditation to refresh this session and wrap it up as a way to re-group.
Yoga can be used for more than simple de-stressing. It can also be used to relieve the symptoms of everyday ailments without the use of medication.
YOGA FOR HEADACHES
There are different types of headaches. Some (such as tension headaches and migraines) are fairly common; Others (sinus headaches or headaches caused by brain tumors) are relatively rare. Various therapies are recommended to deal with headaches. Yoga asanas and breathing can also help, although most are tension-type headaches.
Everyone suffers from tension pain now and again, but if you suffer from this type of headache habit, it is important to consult a doctor or other health professional to treat the pain and work to resolve the ultimate source of stress.
When treating tension headaches with asanas and breathing, it is important to start practicing as soon as possible after you start experiencing pain. Once the headache is established, it will be very difficult to get rid of.
Here is a yoga position that can be used to relieve headaches:
Children’s pose (Balasana)
")
Kneel on the floor. Touch your big toes together and sit on your heels, then make your knees as wide as your hips.
Exhale and place your torso between the thighs. Extend your sacrum at the back of your buttocks and bend your hip points towards the navel, so that they nest down to the inner thigh. When you remove the base of your skull from the back of your neck, lengthen your tailbone from the back of the pelvis.
Place your hands on the floor with your torso, palms apart and your shoulder girdle facing the floor. Experience how the weight of the front shoulder pulls the shoulder blades around your back.
Balasana is a relaxing pose. Stay anywhere from 30 seconds to a few minutes. Beginners can also use Balasana to get a taste of the Balasana front curve, where the torso rests on the thigh. Stay in the pose for 1 to 3 minutes. To come up, first lengthen the front torso, and then press down with the inhalation lift from the tail and down into the pelvis.
Note: You can pretend to be a baby when you get bored, breathe or need to rest. Pick up again with your exercises when refreshed. Therapeutic poses are a great way to get rid of stress quickly at any time.
Standing Forward Bend

Stand with your hands on your hips in a relaxed position. Exhale and bend forward at the hip joint, not at the waist. As you descend, draw the front out of the torso and open the space between the pubis and the top sternum. Like all forward bends, the front torso length is emphasized when you move more fully in position.
If possible, bring your knees straight, the tips of your palms or fingers slightly in front of or next to your feet on the floor, or bring your palms to the back of the ankles. If this is not possible, cross your arms and hold your elbows. Press the heels firmly to the floor and raise the seated bones toward the ceiling. Rotate the upper thigh slightly inwards.
With each inhalation in the pose, lift and lengthen the front torso slightly; With each breath out, the front bend is released a little more. In this way the torso is slated almost vaguely with the breath. Let your head hang from the base of the neck, which is between the shoulder blades, in the back.
This pose can be used as a resting position between standing pose. Stay in the pose for 30 seconds to 1 minute. It itself can also be practiced as a pose.
Do not roll the spine to come up. Instead bring your hands back to your hips and confirm the length of the front torso. Then press your tailbone down and into the pelvis and return to inhalation with the front torso.
YOGA FOR MENSTRUAL CRAMPS
Menstrual cramps can be very debilitating for those who suffer from severe cramps at the beginning of the cycle. When your first inclination is to mourn the loss of the fetus in your bed, try yoga to relieve the pain.
Exercise during menstruation is usually highly recommended. It is believed that exercise can ease the discomfort of your period; Mood swings, restlessness and depression; And reduces bloating.
Most contemporary yoga teachers advise a more rigorous approach to the practice of asanas during menstruation. This makes perfect sense for women who experience drowsiness during their cycles.
However, many other women do not feel the need to change anything about their practice during menstruation, except perhaps limiting strict vertical poses. Each student should decide for himself which type of asana sequence is most suitable for his body during menstruation.
Reclining Bound Angle

Sit with your feet touching each other. Exhale and keep your torso down towards the floor, first tilting your arms.
Once you bend your arms back, use your hands to spread the back of your pelvis and free your lower back and upper buttocks through your table bone. Bring your torso all the way to the floor, support your head and neck on a blanket roll or ballast if necessary.
Hands Hold your upper thigh with your hand and rotate your inner thigh outward, pressing your outer thigh away from the sides of your torso. Next extend your arms along your outer thighs from the hips to the knees and your outer knees away from your hips.
Then adjust your arms to your inner thighs, from the knees to the hips. Imagine your inner groin sinking into your pelvis. Push your hip points together so that the back pelvis widens, the front Pelvis narrow. Place your hands on the floor, from the sides of your torso, at an angle of about 45 degrees, above the palms.
The natural tendency in this is to push the knees to the floor in the belief that this will increase the length of the inner thighs and waist. But especially if your waist is tight, bringing the knees down has the opposite effect of the objective: the groin will stiffen, as will your abdomen and back. Instead, imagine that your knees are floating toward the ceiling and your nostrils continue to settle deep into your pelvis. As you drop from your waist to the floor, so do your knees.
Start To get started, stay in this pose for a minute. Gradually extend your stay anywhere from five to 10 minutes. To get out, use your hands to press your thighs together, then turn to one side and push yourself away from the floor, keeping the head behind the torso.
Move back into sitting position with the soles of your feet touching.
Upward Bow
Feet Return to the sitting position by touching the soles of your feet. Basically, this is a simple back turn. Place on the floor, keep your hands on the floor above your head and raise your back in an arched position.
Seated Twist
Exhale and sit with the right side bent, hold for 30 seconds, then bend to the left for 30 seconds. Repeat each side 30 times, holding for 30 seconds each time.
YOGA FOR DEPRESSION
The term "depression" covers a wide range of conditions ranging from long-term and severe medical or major depression to short-term and episodic mild depression, such as a condition brought on by a major life change such as the death of a spouse. Job loss, divorce.
There are many different treatments available for depression, including anti-depressants and psychotherapy. Studies suggest that even regular exercise, including yoga asanas and breathing, may ease some people from mild to moderate forms of depression.
Of course, the biggest obstacle to using exercise to overcome depression is motivation or lack thereof. Most frustrated people don’t really feel much less than getting out of bed in the morning, exercising.
Even then, failure to see an exercise program makes a depressed person feel worse. So, start slowly, and don’t forget to choose an exercise you really enjoy; If possible, exercise with a supportive partner or group. Try to exercise at least three times a week.
Headstand
Use a folded blanket or sticky mat to pad your head and front. Knees on the floor. Draw your fingers together and set the forearms on the floor, elbows shoulder width apart.
Arms Turn the upper arm slightly outwards, but press the inner wrist firmly to the floor. Set the crown of your head on the floor.
If you are just starting to practice this pose, press the bases of your palms together and snuggle the back of your head in front of the clasped hand. More experienced students can open their hands and place the back of the head in the open palm.
Breathe in and raise your knees off the floor. Carefully move your legs close to your elbows, heels elevated. Actively lift up to the top thigh, forming an inverted "V".
Fix the shoulder blades in front of your back and raise them towards the tailbone so that the front torso stays as long as possible. This will help prevent the weight of the shoulders from getting full on your neck and head.
Exhale and keep your feet off the floor. Go up both legs at the same time, even if it bends your knees and pushes you slightly off the floor. The legs (or thighs, if your knees are bent) rise at right angles to the floor, with the tail resting on the back of the pelvis.
Rotate the upper thigh slightly, and actively press the heel toward the ceiling (straighten it if you turn to the knee). The centre of the arches should align with the centre of the pelvis, which in turn should align above the crown of the head.
Outer firm the outer arms inwards and soften the fingers. Continue pressing the shoulder blades backwards, widening them and pulling them towards the tail. Keep the weight evenly balanced on the two forearms.
Is also essential for your tailbone to move upwards towards the heel. Once the back of the foot is fully lengthened by the AD, maintain that length and press down on the big toe ball so that the inner foot is slightly longer than the outer.
As a beginner, stay in this position for 10 seconds. Slowly add 5 to 10 seconds to your stay each day or until you can hold a relaxed pose for 3 minutes. Then continue for 3 minutes every day for a week or two, until you are relatively comfortable in the pose.
Gradually slowly add 5 to 10 seconds to your stay again or until you can comfortably hold the pose for 5 minutes. Exhale with both feet touching the floor at the same time, without losing the lift of the shoulder blade.
Head to Knee Forward Bend

benefits include:
The calms the mind and helps to alleviate mild depression
Stretches the spine, shoulders, hamstrings and groin
Stimulates the liver and kidneys
improves digestion
Help relieve the symptoms of menopause
Relieves Anxiety Discomfort, Fatigue, Headache, Menstrual Discomfort
Therapeutic for high blood pressure, insomnia and sinusitis
Pregnancy strengthens the back muscles during pregnancy (until the second trimester), not coming forward, keeping your back spine and front torso longer.
Be careful with this pose if you have a knee injury.
Sit on the floor with your buttocks folded in a blanket and your legs straight in front of you. Inhale, bend your right knee, and bring the heel back toward your perineum. Rest the sole of your right foot slightly against your inner left thigh, and with the shin on the right corner of the left foot, place the outer right foot on the floor (if your right knee does not rest comfortably on the floor, support it) a folding blanket).
Press your right hand against the inner right groin, where the thigh joins the pelvis, and your left hand joins the floor next to the hip. Exhale and turn the torso slightly to the left, while you push down and ground the inner right thigh. Line your navel in the middle of the left thigh. You can just stay here, using the strap to lengthen the spine evenly, grounding from the seated bones.
Or, when you’re ready, you can drop the belt down and take your inner left foot, toe sole, with your left hand. Inhale and lift the front torso, pressing the top of the left thigh to the floor and actively extending from the left side. Use the left side pressure on the floor to increase the turn to the left. Then reach for the left side of your left hand. Extend the front torso from the pubis to the top of the sternum, with the arms fully extended.
Exhale through the breath and move forward, not through the hips. Make sure not to force yourself into the front turn, hunt back and shorten the front torso. When floating down, bend your elbows to the sides and remove them from the floor.
Length forward in comfortable stretch. The lower abdomen should touch the thigh first, the head last. Stay anywhere in the pose for 1 to 3 minutes. Come up with inhalation and repeat the instructions opposite the legs for the same length of time.
CONCLUSION
The popularity of yoga is growing without a doubt, as people constantly try to balance the stresses of everyday life with their own spiritual well-being.
It is important for the reader to understand that we are not medical professionals and have tried to introduce yoga and meditation. This book is a great way to get started on your own yoga program.
If you have special health issues, you should be sure and consult your doctor before starting a yoga program or any other exercise program in that regard. We cannot be held responsible for any problems that may arise from your yoga journey. This means that you are an informative tool to help you start that path.
But you will find that once you start yoga in your daily exercise routine, you probably will. You will see a greater state of well-being and a more spiritual connection with both your inner self as well as any higher power you choose to embrace.
Don’t forget to focus on your breathing while posing, and don’t push your body into a position that isn’t comfortable doing it. While meditating, focus on the inner calm you are trying to achieve.
Do these exercises when you get the chance. You don't have to do a whole cycle to feel good. Practicing an exercise when you have time can have therapeutic benefits to the mind, body and soul!
Yoga can make your life better in many ways. It can help you become an excellent partner, parent, worker and person. You can help others by spreading your experiences through yoga and meditation. You tell others how this ancient art has extended your life; imagine the gratitude you will receive!
Peace when you travel to your own Shambhala (place of complete peace).
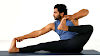


0 Comments
if you have any doubts, Please let me know